Saturday 29 October 2011

Winterproof Your Bike 1: The Chain

Chain components
(image credit: © Marcus Roeder)
Winter, for all its many pleasures, is hard on bikes - that's why so many cyclists who can't afford to relocate to somewhere warmer put their machines away and don't get them out again until spring; when they dust off the cobwebs, emerge pale and blinking into the weak sunlight and discover they've put on a few kilos and are getting beaten by anyone who kept slogging away through the colder months.

One of the main causes of winter mechanical problems is that your bike will spend more time than usual getting wet. Rain water is bad enough, but it's water flicked up onto the frame from the tyres that really causes problems because it carries a nasty selection of bits of grit, dirt and all sorts of other particles that, when mixed with a little grease and oil, makes a highly effective grinding paste that can wear down your expensive components in next to no time. That's why, if you plan on riding through the colder season, it's a good idea to winter-proof your bike - and best of all, this can be done for free. Well, almost free - considerably cheaper than replacing a drive chain, at any rate. This first installment deals with the heart of the drive chain - the chain itself.

You will need: a chain tool, lubricant, paraffin, two containers as described, patience if you've not worked with a chain before.

Cleaning

The chain is probably the one part of the bike that takes the greatest hammering during the winter. Unless you happen to ride a vintage or utility bike fitted with a fully-enclosed chain complete with oil bath, it's going to get soaked in filthy water every time you ride and in the worst cases lubrication won't last even a single journey. What this means is the chain will need to be cleaned much more often than during the summer. What's that? You clean and relubricate your chain after every ride, just like it tells you to in the "Angel's Guide to Bicycle Maintenance?" Good for you - you must be the only person in the world.

The problem with chain cleaning is A: it's really boring and B: repeatedly removing and reinstalling the chain is a pain.

In the case of the former, there's not that much that can be done; but it's worth remembering that whilst snapping a chain and smashing your teeth/delicate parts on the steerer stem is less boring, most people consider it undesirable and prefer to take steps aimed at preventing it from happening - one of the most effective being to keep the chain clean and thus is a healthier state.

Park Tools clip-on chain cleaner with citrus-based cleaning
fluid and brush.
One way to make the task less of a burden is to use a clip-on chain cleaner, a sort of plastic box that opens up so that it can be filled with solvent or a citrus-based degreaser, then enclosed about the chain and clipped to the chain stay. The cranks are then rotated backwards, driving the chain through a series of stiff brushes and wheels designed to brush off all the old lubrication and dirt. In my experience, chain cleaners of this type don't work particularly well or only for very lightly dirty chains. There is as of yet no alternative to removing the chain and giving it a good clean by hand.

However, as mentioned above, modern chains aren't designed to make repeated removal and reinstallation an easy matter - the reason for this apparent step back being that they're designed to allow gear shifts to be made while pedaling hard (older types required the rider to slacken off a bit or risk snapping the chain), an advantage achieved by a much tighter fit between the chain plates and the chain pins. Whereas it was a matter of selecting a random pin and driving it out with a chain tool with older chains, modern designs require a specific pin to be located and removed in order for the chain to be split - other pins can be removed, but will weaken the join and should not be done unless there is no alternative and, ideally, the chain will be replaced with a new one.

SRAM Powerlinks and (not to scale) a Shimano master pin
If you have a SRAM chain/gear system or an eight or lower speed Shimano system, there's an easy answer: the SRAM Powerlink. Resembling half of a normal chain link, this device has a figure-of-eight shaped hole at either end rather than the conventional circular hole, allowing the chain to be removed simply and without a chain tool as many times as may be necessary. SRAM chains are supplied with them, but some bike shops sell them separately (for some reason, it can be difficult to find them sold in this way - presumably because a lot of shops would far rather you bought a more-expensive complete chain than a Powerlink. If you can't find  them, try Chain Reaction who sell them for a reasonable £3.99)). Unfortunately, the Powerlink doesn't work very well with Shimano nine or ten speed systems, failing to engage correctly with the teeth of the cassette and chainrings and creating a "jump" in transmission. Some riders seem to be able to live with this - personally, I find it maddeningly irritating and impossible to tolerate. There is a solution for those with nine speed SRAM systems in the nine speed Powerlink, a very similar but narrower device, and for those with SRAM ten speed set-ups there's the Powerlock, a device with the notable difference that it can be used once only and must be replaced each time the chain is reinstalled - thus bringing us back to square one and begging the question "what's the point?" Neither of these work with Shimano chains or gears, again causing the jumping effect outlined above. There is another version named the Connex master link, manufactured by Wipperman and which requires no tools at all to use - we haven't tried them, but suspect that they'll create the same problems as the Powerlink.

Chain tool. There are several different designs
Personally, I prefer to ignore all that and just deal with matters in the time-honoured way with my trusty chain tool (a device I carry with me at all times, even when not on my bike, and which has allowed me to play the hero on many occasions by rescuing cyclists who would otherwise have been carrying their bike home) and the replacement pin as used in Shimano and Campagnolo nine and ten speed chains. This replacement pin, looking like a double-length standard pin, is narrower at one end than the other. The narrow end is placed through the chain - thus solving the lack-of-a-third-hand problem that evolution failed to foresee - and the thicker end is then driven into place with the chain tool leaving the protruding narrow section to be snapped off with pliers. These can also be hard to obtain from bike shops, but Chain Reaction do a pack of three for £4.99).
It's quite common to hear people say they find splitting a chain fiddly and difficult but, like most things, it comes with practice and, once you have "the knack," is remarkably easy to get right every time. Describing how to do it would require a fairly lengthy bit of text, so instead here's an instructional video courtesy of The Veloweb...


See? Nothing to it, is there? Practice with an old chain if you're worried about ruining the one you're using on your bike.

Right, so you've got the chain off. Now let's give it a proper, deep clean. What you need is some sort of a container with a tight-fitting lid (an empty soft drink bottle works, but it can be tricky to get the chain back out again - just cut the bottle open if you need to), a shallow container such as a deep tray, some paraffin (or kerosene, if you happen to speak American English) and a stiff brush, either a proper chain-cleaning brush or a toothbrush. Place the chain into the container, then add sufficient paraffin to cover it before giving it a good shake for at least a minute so that the paraffin penetrates all the rollers and begins to loosen the gunk. Remove it from the container and place it into the shallow container with some fresh paraffin, then give it a good scrub with the brush making sure you cover the full length and leave no part unbrushed. Once done, put it back into the original container (or a new one if you did have to cut it open) and repeat the shaking to remove tiny particles freed up by the brush. Having removed it once again, wipe the paraffin off with a clean rag and then hang the chain for about an hour to dry thoroughly.

Lubrication

Now the chain needs to be lubricated. Some people prefer to carry out the process with the chain in place on the bike but many - including us - prefer to have the chain off the bike so as to prevent lubricant fouling the brake pads/disc rotors and tyres/ getting into places where it's not required and will just attract dirt build-up, such as between the cogs of the gear cassette. It's up to you, but the hot wax method described below can very obviously only be carried out with the chain detached from the bike.

Solid and aerosol chain waxes
In a dry winter, a dry lubricant or chain wax that will help prevent dirt sticking to the chain is the obvious choice and there are a wide variety available. Some are sold as a solid wax which can be melted in a saucepan on a stove before the chain is immersed, removed and allowed to dry (using tongs, obviously), others come in an aerosol can with a solvent carrier chemical and can be sprayed onto the chain, the carrier then evaporating and leaving the wax behind. We find that the hit wax method is far superior, since the chain can be stirred around in the molten wax to ensure it gets inside the rollers where it's most needed. Once done, allow to dry and use a clean rag to remove excess wax from the exterior of the chain plates.

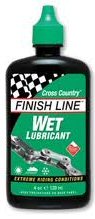
10/10 for Finish Line's
excellent wet lube
Unfortunately, chain waxes are not as good at keeping moisture out of the chain as wet lubricants which, being oil-based, will repel water. Again, there are many different types available - make sure you use only a dedicated lubricant sold by a proper bike shop as lubricants intended for motor vehicle use are heavier and sticky, light penetrating oils such as WD-40 only last a few kilometres and common household oils such as 3-in-1 are vegetable-based and corrosive. It is our opinion that you can do a lot worse than Finish Line's Cross-Country Wet Lubricant which, having been formulated with winter cross-country mountain bike races in mind, seems to last better than anything else in wet conditions. Once again, it may prove easier to lubricate the chain when it's not attached to the bike. Lie it flat on a clean surface and work around the length, applying the lubricant only to the rollers and pins - it serves no purpose on the plates and will attract dirt. Allow it time to soak in, then wipe the exterior to remove excess.

Finally, reinstall the chain using whichever process in the video is applicable to the type of chain you have.

Replacement

It's commonly said that a chain should be replaced annually. However, this applies only in the case of riders who cover whatever the person who first suggested it considered to be an average number of kilometres per year. In the real world, we all ride to greater or lesser degrees and so, while a recreational rider may find that a chain lasts two or more years, a keen cyclist who covers thousands of kilometres per annum will find that their chain wears out and needs to be replaced far more frequently.

A good yardstick is to assume that, for the majority of us who perhaps don't clean and lubricate our chains quite as much as we should, replacement every 3000km is satisfactory in the case of road bikes (cyclo cross and mountain bikes - those mountain bikes that are used off-road, anyway - will need a new chain much more frequently). This will rise to 5000km for those who either have nothing better to do or find a perverse enjoyment in keeping their chain perfectly maintained and even as high as 6000km or more for fixie riders, since single-gear bikes place far less stress on the chain than derailleur-equipped bikes (hub gear bikes also enjoy extended chain life). In the case of a single-speed bike fitted with a fully-enclosed chain and maintained chainguard oil bath, the chain may last considerably longer - it's not uncommon to see vintage bikes fitted with their original chain.

That assumption holds true in summer only and is massively reduced during winter, when a chain that receives average maintenance might last as little as 1000km or less - a week, for some cyclists (fortunately, the majority of riders who cover that sort of distance in a week during winter are likely to be sponsored professionals and thus will not have to pay for their own replacement chains). The best option, therefore, is to replace the chain twice per year with the winter chain being used for a shorter period due to the greater wear it will need to withstand: put your winter chain on at the start of November, replace it with the new summer chain at the start of April and, to keep it running really well, take it off, turn it round and flip it over halfway through each period. It's worth knowing that while a single chain usually costs from around £15 upwards (depending on retailer and model), bike shops both online and on the highstreet often sell three chains for a discounted total.

Wednesday 26 October 2011

National Hill Climb Championships this Sunday!

We're now well into the British Hill Climb season, and all over the nation cyclists are pitting themselves, their machines and their tortured calf muscles against some of the most challenging roads in the country. If you've never been to a hill climb event before but harbour a wish to return to simpler days of cycling before television and multi-million pound sponsorship contracts, these smaller-scale events may be precisely what you're looking for. Run in most cases by local clubs, they work on an individual time trial format with riders setting off alone at one-minute intervals and aiming to complete the course in as short a time as possible. This ensures that, rather than the "hours of standing around for a minute of excitement" as experienced at stage races, spectators are able to watch riders for a period of time corresponding to the number of entries - in this case, with 150 names on the startlist, some 2.5 hours with the first rider setting off at 11:01 (remember the clock change the night before).

Sunday the 30th of October brings the highlight of the hill climber's calendar with the National Championships, this year being held in the Long Hill course. Known to the local cycling club as J9/13, the 7.145km (4.44 miles) route is set among some of the most beautiful scenery Derbyshire's Peak District has to offer and has an average gradient of 1:31 or 31% - however, the course profile below shows that some sections are considerably steeper with ramps in several sections including a very steep one shortly before 5250m and another close to the finish.

Course profile - click for larger view

Course Details

Timing begins at a postbox (53°19'7.20"N 1°59'11.25"W) on the left and around 15m past the Mevril Road junction, 28m from the Vaughn Road junction on the same side, heading south away from Whaley Bridge on Buxton Road (the A5004), then heads uphill through trees to a medium left bend 319m after the start. A straight section follows until a tighter left bend 611m from the start - the trees are thicker here, making the bend potentially slippery due to leaves and moss on the road surface if it's been windy or raining. Punctures will also be more likely in such a situation.

The Shady Oak, Fernilee
Having rounded the bend, the riders begin Long Hill and come to another medium left 928m from the start and a sweeping right 150m later. The road is much more exposed here and could be subject to wind. The Shady Oak public house is on the left, 1555m from the start (53°18'30.97"N 1°58'37.92"W), at which point the gradient becomes more challenging. There are more trees lining the road as it passes through Fernilee, then trees on the right-hand side after 2518m - from the left, the road becomes very exposed here and can be treacherous if the wind is blowing from the east. The extreme right of the road offers slight relief as the wind blows upward over the thick forest, but riders taking this option will be at great risk of puncturing. A sweeping left bend then leads into a right almost tight enough to be considered a hairpin 2905m from the start, then the riders pass Fernilee Reservoir on the right with no shelter to either side and arrive shortly at the halfway point.

Now 300m above sea level, the race enters an exposed section running along a hillside. In places, the terrain rises very steeply on the left, leading to a possibility of mud on the road - however, this section is straight and shouldn't cause problems except for the potential for punctures due to small stones in the mud. If it's windy and blowing from the east, this section can provide shelter; if it's blowing from the west, it can be very difficult. There is a medium 90 degree left-hand bend 3729m from the start, a short way past the lay-by on the right, then a pair of "rumble strip" traffic calming devices before a sweeping right bend 4079m from the start.

Having rounded the bend, the riders begin a long straight of some 1020m with only a very slight bend towards the far end - however, this section is the most exposed along the entire parcours and can be very challenging in wind. Another rumble strip in the left carriageway warns riders of the tight 90 degree left a few metres ahead: a challenging bend due to a dirt track leading off to the right (hence dust, mud and stones on the road) and, just around the apex, a stand of what appear to be hawthorn trees - as the road layout will tend to push riders towards that side, this is likely to be another puncture blackspot.

Fernilee Reservoir
(image credit: PMurph CC BY-SA 3.0)
Another straight section of around 487m follows, described by local cyclists as tending to be sheltered from prevailing winds, and leads to a tight 130 degree right. Just ahead, a tall tree can be seen standing alone on the right-hand side of the road, marking a tight 90 degree left 5981m from the start followed by an easier right 120m later. After 6307m from the start, the road is once again lined with woodland on both sides which may once again cause punctures and slippery conditions.

After emerging from the woodland, riders come to another 90 degree right 81m later followed by a gentler left 277m later. The route then enters a final straight section of 217m before coming to a lay-by (53°16'28.61"N 1°57'11.56"W), where a car and officials will be stationed to record final times. Riders will continue past them and the right-hand corner for Goyt's Lane a short way beyond to the next lay-by where a van will be waiting to take them back to the race HQ located in the Whaley Bridge Bowling Club (53°19'33.86"N 1°59'5.33"W). Prizes will be awarded here after the event.

Recommended spectating points

The grassy banks near the start (53°19'7.01"N 1°59'10.94"W), though crowds are likely to be largest here due to residents of the nearby housing estates coming out to watch. Current British women's champion Lyn Hamel (HerbalLife-Wheelbase) will set out at 12:40; current men's champion Dan Fleeman is not participating, leaving 2008 champion Matt Clinton as favourite - he'll set out at 13:30.

The large lay-by at the first bend (53°18'57.05"N 1°59'17.96"W). While maps show that there is lots of parking here, expect it to be full on the day unless you arrive early.

Wasteland area shortly before The Shady Oak (53°18'37.35"N 1°58'44.92"W).

The Shady Oak public house and its car park (53°18'30.47"N 1°58'37.20"W) - offers excellent views in both directions along the road and over the Goyt Valley in addition to a selection of real ales, Peroni lager and excellent food. What better way to enjoy the race? Once again, don't expect there to be much space in the car park.

Grassy bank on the right, just past The Shady Oak (53°18'22.68"N 1°58'36.48"W). Excellent views up and down the road, potentially a very good spot for photography.

All points along the moorland section between 53°17'44.54"N 1°58'30.31"W and 53°16'51.30"N 1°57'8.53"W. Be aware that this section is 300m+ above sea level and very exposed for much of its length, so be sure to take warm, wind and water proof clothing. Hats, gloves, thermoses of tea and hipflasks of whisky (ideally Laphroaig) are also recommended.

The final section between 53°16'47.59"N 1°57'3.68"W and 53°16'28.59"N 1°57'11.85"W. There is plenty of room around the finish for spectators without crowding the timing car and officials.

Monday 24 October 2011

The end of the Euskies?

The orange jerseys may be no more in 2012.
(image credit: Fanny Schertzer CC BY-SA 3.0)
The orange jerseys have been a feature of top races for years and the riders who wear them are among the most popular in cycling with a loyal following in both their Basque homeland and abroad - but there's a possibility that Euskaltel-Euskadi might not be with us in 2012.

Speaking to the Spanish newspaper Marca, team captain Samuel Sanchez said that the squad has been experiencing difficulties in securing a replacement backer: "If things continue this way, Euskaltel will vanish in 2012," he explained, adding that his squad's current sponsorship runs out at the end of this year before expressing his hopes that the current sponsor would extend the contract or a new one would be found.